This article is currently in the process of being translated into Korean (~36% done).
The OpenFileDialog
대부분의 윈도우 어플리케이션에서 파일을 열고 닫을 때 동일한 형태의 dialog가 보여지는 이유는 그것들이 개발자들이 접근할 수 있는 Windows platform의 Windows API이기 때문입니다
WPF에서는, 열기와 저장 다이얼로그는 Microsoft.Win32 네임스페이스를 사용한 기본 다이얼로그인것을 확인할 수 있을것입니다. 여기서는 OpenFileDialog클래스 위주로 설명하며, 하나 이상의 파일을 여는 다이얼로그를 출력하는 방법을 쉽게 만들어 줄것입니다.
간단한 OpenFileDialog 예시
TextBox 컨트롤에 파일을 로드하기 위해 아무 추가 옵션 없이 OpenFileDialog를 사용하는 것으로 시작해 봅시다:
<Window x:Class="WpfTutorialSamples.Dialogs.OpenFileDialogSample"
        xmlns="http://schemas.microsoft.com/winfx/2006/xaml/presentation"
        xmlns:x="http://schemas.microsoft.com/winfx/2006/xaml"
        Title="OpenFileDialogSample" Height="300" Width="300">
    <DockPanel Margin="10">
        <WrapPanel HorizontalAlignment="Center" DockPanel.Dock="Top" Margin="0,0,0,10">
            <Button Name="btnOpenFile" Click="btnOpenFile_Click">Open file</Button>
        </WrapPanel>
        <TextBox Name="txtEditor" />
    </DockPanel>
</Window>
using System;
using System.IO;
using System.Windows;
using Microsoft.Win32;
namespace WpfTutorialSamples.Dialogs
{
public partial class OpenFileDialogSample : Window
{
public OpenFileDialogSample()
{
InitializeComponent();
}
private void btnOpenFile_Click(object sender, RoutedEventArgs e)
{
OpenFileDialog openFileDialog = new OpenFileDialog();
if(openFileDialog.ShowDialog() == true)
txtEditor.Text = File.ReadAllText(openFileDialog.FileName);
}
}
}
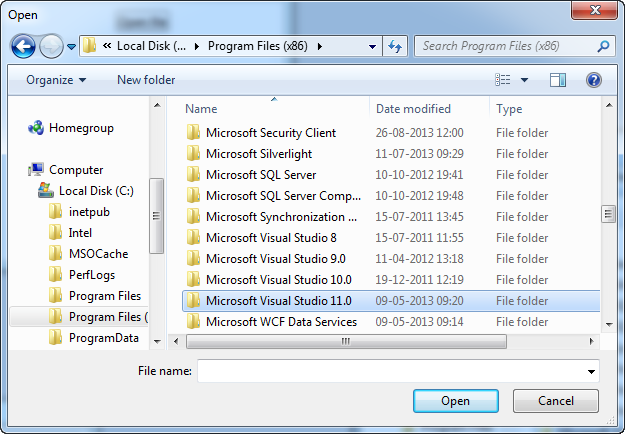
당신이 파일 열기 버튼을 누르면, OpenFIleDialog가 인스턴스화되어 보여질 것입니다. 당신이 사용하는 Windows 버전과 선택한 테마에 따라 다음과 같이 보일 것입니다:

ShowDialog() 메소드는 즉 true와 false 또는 null이 될 수 있는 nullable의 boolean 값을 반환합니다. 사용자가 파일을 선택하고 "열기" 버튼을 누르면, 결과는 True이고, 이 경우 TextBox 컨트롤로 파일을 로드하려고 시도합니다. OpenFileDialog의 FileName 프로퍼티를 이용해 선택된 파일의 전체 경로를 얻습니다.
필터
일반적으로 당신이 사용자가 당신의 애플리케이션에서 파일을 열길 원할 때, 파일 형식을 하나 또는 여러 개로 제한을 하고 싶을 겁니다. 예를 들면, MS Word는 대부분 Word 파일을 열고 (.doc 및 .docx 확장자), 메모장은 대부분 텍스트 파일을 엽니다. (.txt 확장자)
You can specify a filter for your OpenFileDialog to indicate to the user which types of file they should be opening in your application, as well as limiting the files shown for a better overview. This is done with the Filter property, which we can add to the above example, right after initializing the dialog, like this:
openFileDialog.Filter = "Text files (*.txt)|*.txt|All files (*.*)|*.*";결과는 다음과 같습니다:

Notice how the dialog now has a combo box for selecting the file types, and that the files shown are limited to ones with the extension(s) specified by the selected file type.
The format for specifying the filter might look a bit strange at first sight, but it works by specifying a human-readable version of the desired file extension(s) and then one for the computer to easily parse, separated with a pipe (|) character. If you want more than one file type, as we do in the above example, each set of information are also separated with a pipe character.
So to sum up, the following part means that we want the file type to be named "Text files (*.txt)" (the extension in the parenthesis is a courtesy to the user, so they know which extension(s) are included) and the second part tells the dialog to show files with a .txt extension:
Text files (*.txt)|*.txtEach file type can of course have multiple extensions. For instance, image files could be specified as both JPEG and PNG files, like this:
openFileDialog.Filter = "Image files (*.png;*.jpeg)|*.png;*.jpeg|All files (*.*)|*.*";Simply separate each extension with a semicolon in the second part (the one for the computer) - in the first part, you can format it the way you want to, but most developers seem to use the same notation for both parts, as seen in the example above.
기본 디렉토리 설정하기
OpenFileDialog에서 사용하는 기본 디렉토리는 Windows에 의해 정해지지만, InitialDirectory 프로퍼티를 사용하면 재정의 할 수 있습니다. 당신은 주로 사용자에 특화된 디렉토리, 즉 애플리케이션 디렉토리나 아마도 마지막으로 사용했던 디렉토리로 값을 설정할 것입니다. 다음과 같이 문자열 형식으로 된 경로로 설정할 수 있습니다:
openFileDialog.InitialDirectory = @"c:\temp\";If you want to use one of the special folders on Windows, e.g. the Desktop, My Documents or the Program Files directory, you have to take special care, since these may vary from each version of Windows and also be dependent on which user is logged in. The .NET framework can help you though, just use the Environment class and its members for dealing with special folders:
openFileDialog.InitialDirectory = Environment.GetFolderPath(Environment.SpecialFolder.MyDocuments);In this case, I get the path for the My Documents folder, but have a look at the SpecialFolder enumeration - it contains values for a lot of interesting paths. For a full list, please see this MSDN article.
여러 파일
당신의 애플리케이션이 여러 개의 파일을 여는 것을 지원하거나 OpenFileDialog를 사용해 하나 이상의 파일을 선택하게 하고 싶다면, Multiselect 프로퍼티를 활성화해야 합니다. 다음 예시에서는 그 작업을 수행했으며 독자를 위해 필터링과 기본 디렉토리를 적용한 것을 포함해 위에서 언급한 모든 기술을 적용하였습니다:
<Window x:Class="WpfTutorialSamples.Dialogs.OpenFileDialogMultipleFilesSample"
        xmlns="http://schemas.microsoft.com/winfx/2006/xaml/presentation"
        xmlns:x="http://schemas.microsoft.com/winfx/2006/xaml"
        Title="OpenFileDialogMultipleFilesSample" Height="300" Width="300">
    <DockPanel Margin="10">
        <WrapPanel HorizontalAlignment="Center" DockPanel.Dock="Top" Margin="0,0,0,10">
            <Button Name="btnOpenFile" Click="btnOpenFiles_Click">Open files</Button>
        </WrapPanel>
        <ListBox Name="lbFiles" />
    </DockPanel>
</Window>
using System;
using System.IO;
using System.Windows;
using Microsoft.Win32;
namespace WpfTutorialSamples.Dialogs
{
public partial class OpenFileDialogMultipleFilesSample : Window
{
public OpenFileDialogMultipleFilesSample()
{
InitializeComponent();
}
private void btnOpenFiles_Click(object sender, RoutedEventArgs e)
{
OpenFileDialog openFileDialog = new OpenFileDialog();
openFileDialog.Multiselect = true;
openFileDialog.Filter = "Text files (*.txt)|*.txt|All files (*.*)|*.*";
openFileDialog.InitialDirectory = Environment.GetFolderPath(Environment.SpecialFolder.MyDocuments);
if(openFileDialog.ShowDialog() == true)
{
foreach(string filename in openFileDialog.FileNames)
lbFiles.Items.Add(Path.GetFileName(filename));
}
}
}
}
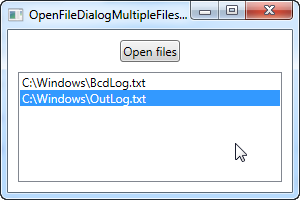
이 코드를 테스트하면 Ctrl이나 Shift 키를 누른 채로 마우스로 클릭해 같은 디렉토리에서 여러 개의 파일을 선택할 수 있는 것을 볼 수 있습니다. 한번 승인되면, 이 예시는 FileNames 프로퍼티를 반복하여 ListBox 컨트롤에 파일명들을 추가합니다.
Summary
As you can see, using the OpenFileDialog in WPF is very easy and really takes care of a lot of work for you. Please be aware that to reduce the amount of code lines, no exception handling is done in these examples. When working with files and doing IO tasks in general, you should always look out for exceptions, as they can easily occur due to a locked file, non-existing path or related problems.