This article has been localized into Chinese by the community.
取消BackgroundWorker
正如我们在上一篇文章中看到的那样,多线程具有额外的优势,即能够在执行耗时的操作时显示进度并且不会使应用程序中止。
当你在UI线程上执行所有工作,你将面临的另一个问题是,用户无法取消正在运行的任务 - 为什么会这样? 因为如果UI线程忙于执行冗长的任务,则不会处理任何输入,这意味着无论用户如何努力地点击取消按钮或Esc键,都不会发生任何事情。
对我们来说幸运的是,构建BackgroundWorker就是为了让您可以轻松进行任务并取消,而我们在上一章讲述了整个的进程进度部分,接下来这一部分将是关于如何使用取消进程。 让我们直接看一个例子:
<Window x:Class="WpfTutorialSamples.Misc.BackgroundWorkerCancellationSample"
        xmlns="http://schemas.microsoft.com/winfx/2006/xaml/presentation"
        xmlns:x="http://schemas.microsoft.com/winfx/2006/xaml"
        Title="BackgroundWorkerCancellationSample" Height="120" Width="200">
    <StackPanel VerticalAlignment="Center" HorizontalAlignment="Center">
        <TextBlock Name="lblStatus" HorizontalAlignment="Center" Margin="0,10" FontWeight="Bold">Not running...</TextBlock>
        <WrapPanel>
            <Button Name="btnStart" Width="60" Margin="10,0" Click="btnStart_Click">Start</Button>
            <Button Name="btnCancel" Width="60" Click="btnCancel_Click">Cancel</Button>
        </WrapPanel>
    </StackPanel>
</Window>
using System;
using System.ComponentModel;
using System.Windows;
using System.Windows.Media;
namespace WpfTutorialSamples.Misc
{
public partial class BackgroundWorkerCancellationSample : Window
{
private BackgroundWorker worker = null;
public BackgroundWorkerCancellationSample()
{
InitializeComponent();
worker = new BackgroundWorker();
worker.WorkerSupportsCancellation = true;
worker.WorkerReportsProgress = true;
worker.DoWork += worker_DoWork;
worker.ProgressChanged += worker_ProgressChanged;
worker.RunWorkerCompleted += worker_RunWorkerCompleted;
}
private void btnStart_Click(object sender, RoutedEventArgs e)
{
worker.RunWorkerAsync();
}
private void btnCancel_Click(object sender, RoutedEventArgs e)
{
worker.CancelAsync();
}
void worker_DoWork(object sender, DoWorkEventArgs e)
{
for(int i = 0; i <= 100; i++)
{
if(worker.CancellationPending == true)
{
e.Cancel = true;
return;
}
worker.ReportProgress(i);
System.Threading.Thread.Sleep(250);
}
e.Result = 42;
}
void worker_ProgressChanged(object sender, ProgressChangedEventArgs e)
{
lblStatus.Text = "Working... (" + e.ProgressPercentage + "%)";
}
void worker_RunWorkerCompleted(object sender, RunWorkerCompletedEventArgs e)
{
if(e.Cancelled)
{
lblStatus.Foreground = Brushes.Red;
lblStatus.Text = "Cancelled by user...";
}
else
{
lblStatus.Foreground = Brushes.Green;
lblStatus.Text = "Done... Calc result: " + e.Result;
}
}
}
}
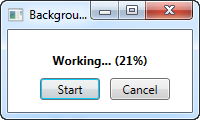
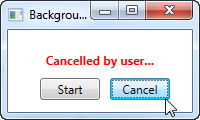
由图可见,这个XAML非常基础 - 只是用于显示当前状态的标签,以及用于启动和取消工作的几个按钮。
在后台代码中,我们首先创建BackgroundWorker实例。特别注意我们把WorkerSupportsCancellation和WorkerReportsProgress属性设置为真 - 如果没有这个设置,当我们尝试使用这些功能,就会抛出异常。
取消按钮就是简单地调用CancelAsync()方法 - 这将通过将CancellationPending属性设置为真的方式,来向worker发出信号,以取消正在运行的进程,但这是你可以从UI线程做的仅有的操作 - 其余的操作需要从DoWork事件内部完成。
在DoWork事件中,我们以250毫秒一次迭代的方式计数100。 这给了我们一个很好而且冗长的任务,在这个任务中我们可以报告进度并且还有时间点击“取消”按钮。
注意到,我如何在每次迭代时检查CancellationPending属性 - 如果worker被取消,这个属性将为真,我们也将有机会跳出循环。 我在事件参数上设置了Cancel属性,表示进程已被取消 - 这个值在RunWorkerCompleted事件中被使用,以此值来查看worker是否真地完成或是已被取消。
在RunWorkerCompleted事件中, 我只是简单地检查worker是否被取消,然后相应地更新状态标签。

小结
总而言之,向BackgroundWorker添加取消支持很简单 - 只需确保将WorkerSupportsCancellation 属性设置为真,并在执行工作时检查CancellationPending 属性。 然后,当你想要取消任务时,你只需要在worker上调用CancelAsync() 方法就可以了。